Pink and Green 3d Simple to Draw Skull Art
How to create eye-catching 3D art
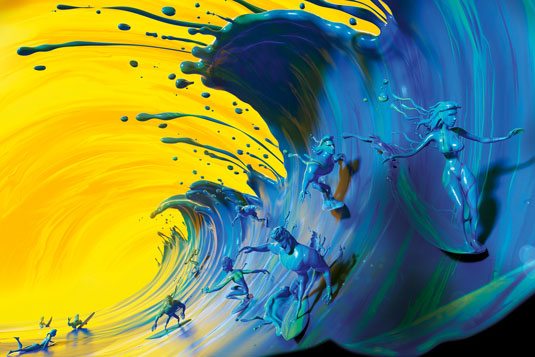
It's always best to create images around the things you love, harnessing personal experiences to create artwork that's unique and inspiring. It's a belief that 3D generalist Daniel D'Avila took to heart for his colourful illustration, Ink Riders.
"Art and surfing are both great passions of mine," says the artist. "Surfing itself is one of the most beautiful and aesthetic sports I know, and although surfing doesn't have a relation with art, the blend between them reached a great result."
D'Avila says he used DynaMesh and ZRemesher for the characters and Photoshop to simulate the mixed paints that go into making up the smoothly rendered, oval wave. In his day job D'Avila creates photorealistic images for advertising, and as a generalist he says he's always looking to push himself and try new techniques, which is where his personal work helps.
"What really inspires me is to achieve a fresh visual regardless of what the subject is. And generally I can only reach that with hard work and observation. In the end it's very rewarding though," says D'Avila. Generally the artist spends time sketching his subjects in 2D before researching anatomy and lighting. Then the modelling begins and finally D'Avila likes to test his compositions, adjusting and refining until the image takes shape and comes alive.
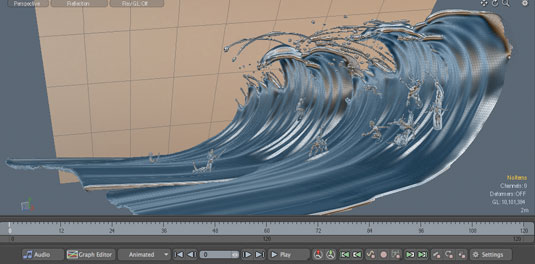
01. Start with a basic model
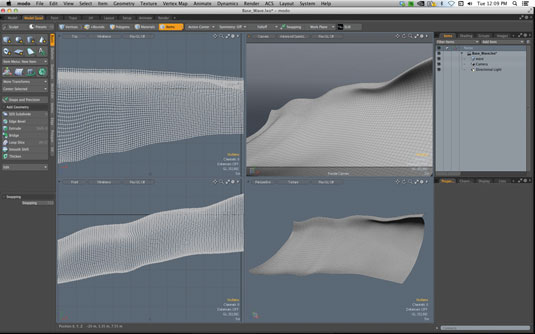
The first task was to set the base mesh in Modo. From a cylinder, I simply modelled the necessary polys needed for the sculpting process. Then I positioned the wave model in my camera scene. Sometimes, if necessary, I'll delete the polygons out of my field of view, so the scene becomes cleaner and lighter.
02. Set the values
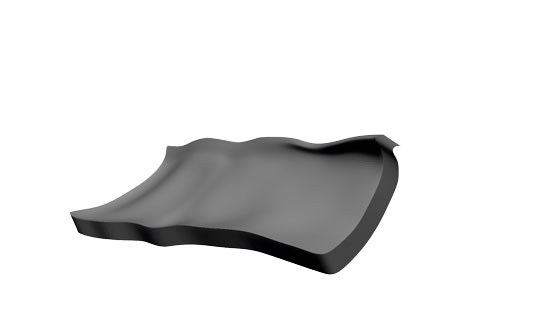
I exported the plane as an .obj and imported it into ZBrush. In the Subtool menu I clicked the Extract tab, to give the plane some thickness, then I set the value and clicked Accept. I prefer to do this before I start sculpting the details since it's better to have some volume to sculpt.
03. Brush choices
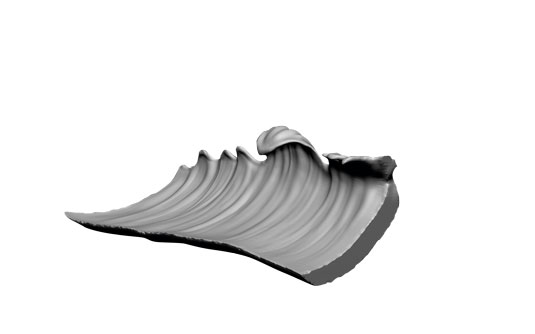
I used the Standard, Dam Standard and Smooth brushes to sculpt the wave's ridges and the details. Around the crests I used the Inflate brush for a better liquid effect.
04. Character sketches
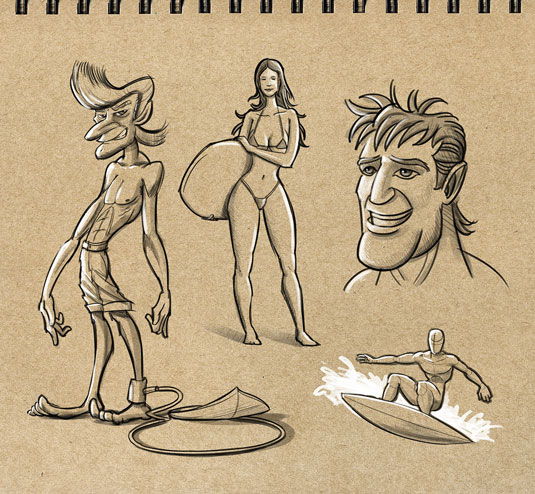
When it comes to creating characters I always make sketches before I begin the modelling. I find it easier to separate the concept work from the modelling tasks. Once I was happy with the raw ideas, I gathered the chosen sketches and went back to ZBrush, where the 3D sketching process is much faster.
05. Define the movement
I sketched each character so they looked fluid; the end result needed the feeling of motion. In this case I didn't need a bunch of details since all of them would be made of paint. Once I was satisfied with the result I projected the high-resolution model over a low-resolution mesh in all subdivisions.
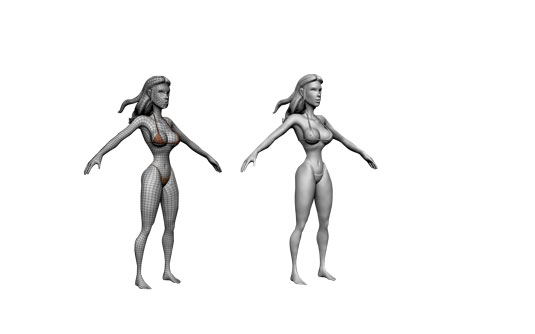
06. Tweaking the pose
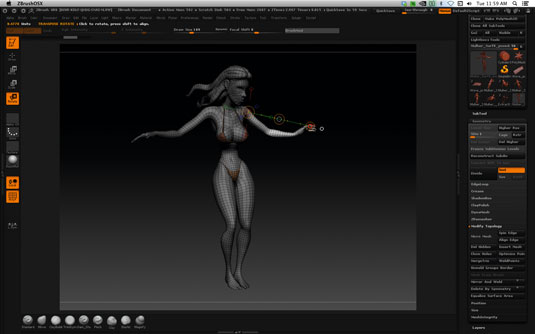
I used my optimised model for posing. I switched to the lowest subdivision and began tweaking with the Transpose tool until I found my desired pose. Photographic reference is very useful to look at during this stage. Once I was happy, I exported all the characters in a mid-resolution back to Modo.
07. Detail the wave
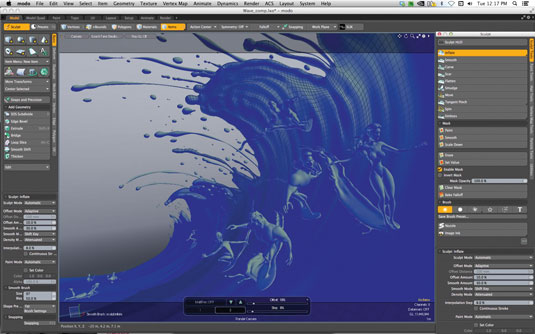
I positioned all the characters in the scene and began making refinements in the wave itself by adding in paint drops and splatters. All these details were made with the Inflate and Move brushes.
08. Simulate the paint effect
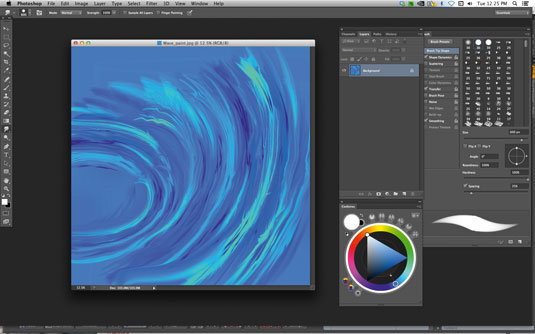
The diffuse textures of the wave and characters were painted in Photoshop to simulate the mixed paint effect.
09. Set the colour
The textures and final material adjustments were applied in Modo. The same yellow background was used inside the environment so the mood and tone feels like a sunset.
10. Finishing touches

After the render is done, I begin the post-production in Photoshop – colour corrections are the main work at this stage. The wave in the foreground was applied with a subtle depth-of-field blur in After Effects, then I added the final touches, such as the bokeh effect in the foreground. I changed the blend mode of the layer to Screen and voilà, Ink Riders was born!
Words: Daniel D'Avila
Daniel D'Avila is a generalist illustrator who runs his own studio, D'Avila Studio, based in São Paulo, Brazil. D'Avila works for ad agencies in São Paulo whose clients include Panasonic, Citroën and Google. This article originally appeared in 3D World issue 182.
Related articles
Pink and Green 3d Simple to Draw Skull Art
Source: https://www.creativebloq.com/3d/how-create-eye-catching-3d-art-91413077
0 Response to "Pink and Green 3d Simple to Draw Skull Art"
Post a Comment